
How to Edit Light and Airy


How to edit light and airy. Woo hoo, here we are guys! Can you believe it? Yes this is number five in this series and you have finally arrived! So, you wanna create images with those dreamy light and airy tones and you’re on the struggle bus? I’ve been there and I’ve got you covered in this post.
Ok first thing! This is actually part of a series of blog posts about elevating your images in post processing. So if you’re just joining us, you should definitely check out the links I listed below. (Particularly shooting for your style. If you already know you want light and airy starting with concepts in camera is crucial!)
Shoot for your style
Finding your style
Culling
What Editing Software should I Use?
So let’s get into it!
How to edit light and airy: FIRST AVOID THIS
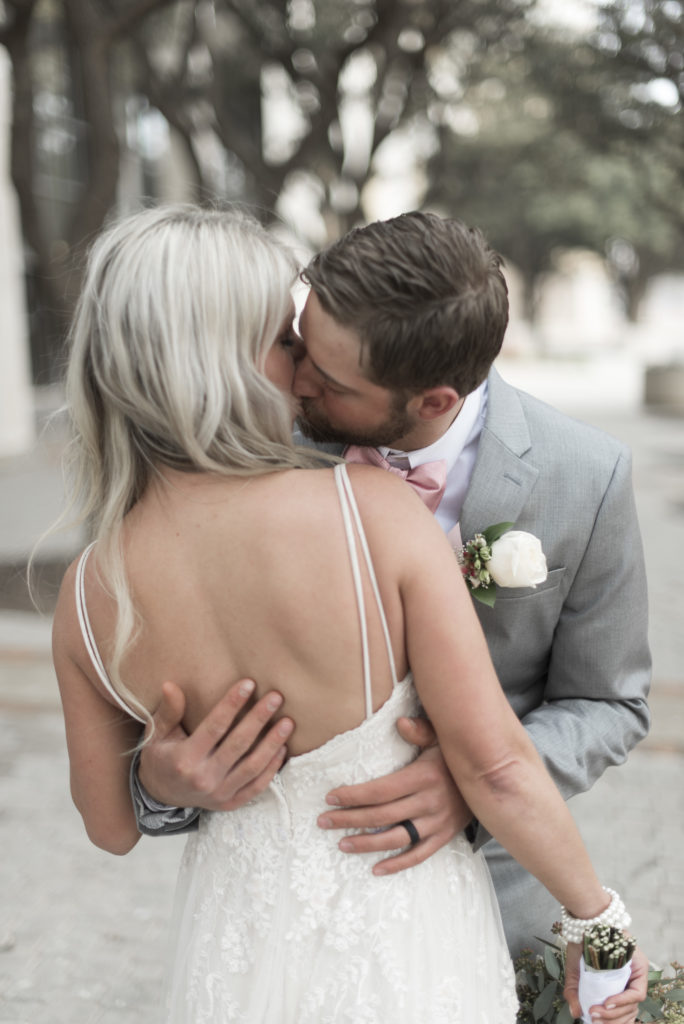
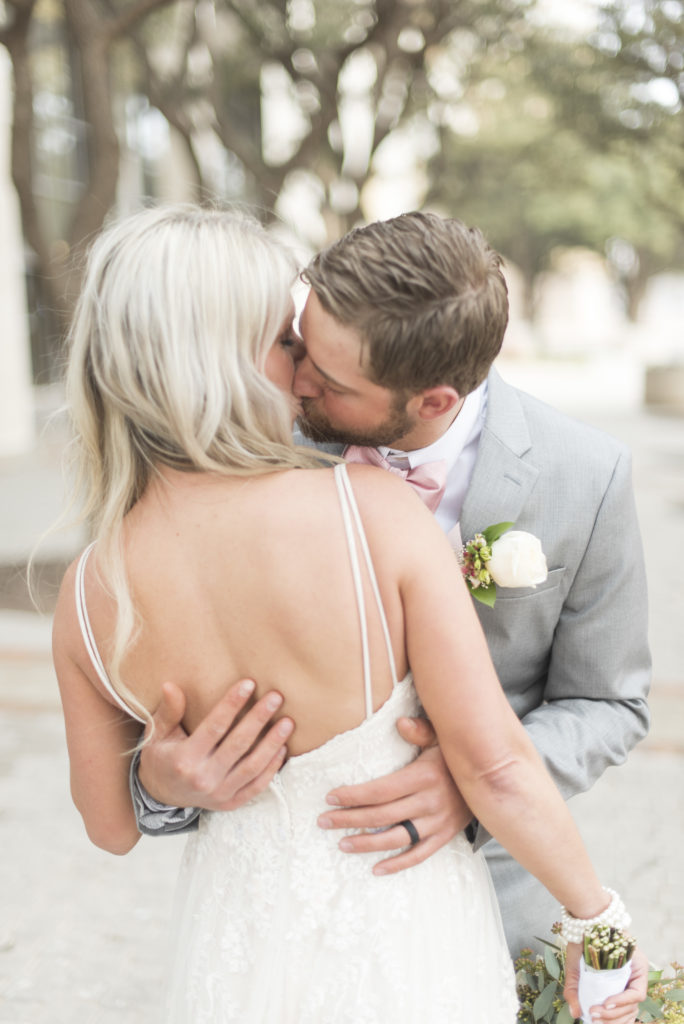
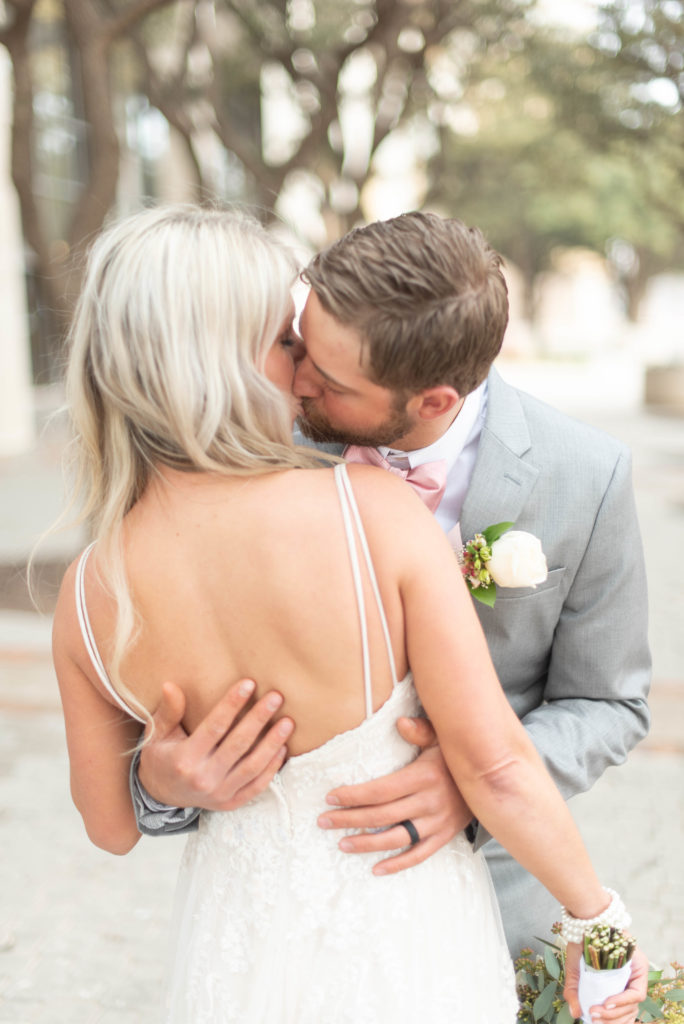
The very first thing I want to address is a crucial topic for light and airy images. And that is over-exposure and blown out highlights. The first step in getting light and airy images is not bumping up your exposure so overly bright that you start to lose detail in your image. If you aren’t familiar with the term ‘blown out’ highlights, in other words it’s the brightest parts of your images that are void of detail and will kind of look like bright white blobs. This is absolutely what we do not want! That detail is important y’all. The first place this will typically happen-aka. when you know you’ve gone too far- will be in the bride’s wedding dress. The bride wants to see her dress and all that gorgeous detail, not a bright white blob. 😉
Take a look at your current images and style of editing. Notice if your brides’ dresses have pieces of it that are completely blown out. Below is an example of a straight out of camera image, versus a blown out image versus our goal of light and airy. Just keep in mind, the key to any editing: is less is more. Start with smaller adjustments instead of large. So, don’t take the slider to an extreme, gently adjust it. Combing the adjustments altogether will create a big overall change. The longer you do photography, your eyes will continue to adjust and easily be able to notice slight differences in yours and others’ images.


Basics for how to Edit Light and Airy
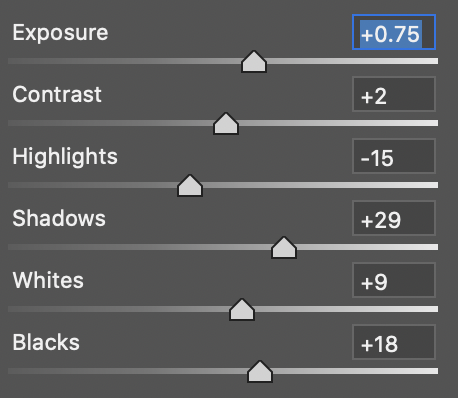
OK, so going down the line of the Basic editing tab in Lightroom, here are the things you want to adjust:
- Exposure: Brighten the overall exposure. Remember not too bright!
- Contrast: I make the slightest adjustment in my contrast, because I like very soft images. Roughly +0-10 depending on the image.
- Highlights: Slightly bring down highlights.
- Shadows: Brighten/lift the shadows.
- Whites: I adjust my whites slider based on what I feel like the photo needs, so this for me can go up or down.
- Blacks: Brighten/lift the blacks.
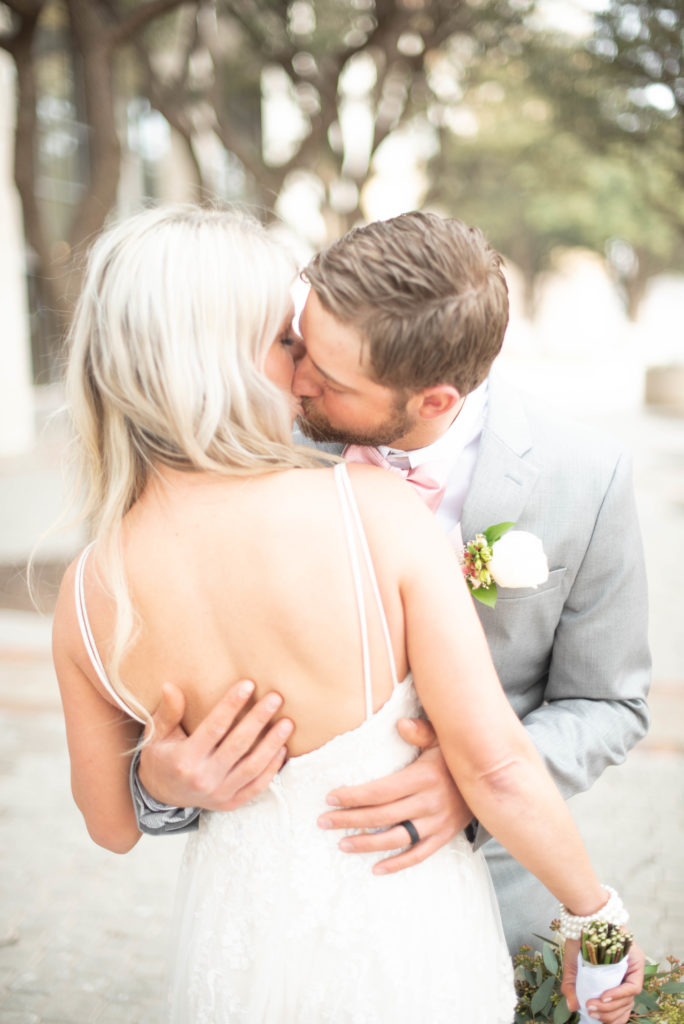
Typically my basic tab sliders will look very similar to the image below, and this is the result it will yield.


Really, there you have it, the basics on how to edit light and airy. Let’s briefly chat about something else to avoid and an awesome little two-second-mind-blowing-hack to help you.
ANOTHER THING TO AVOID
It’s crucial to know what to avoid, which is why I keep addressing it. If you’re only made aware of what to do, and not what not to do, then how can you avoid it? Boy that sounded confusing, but you get my drift! I mean I hope, ha!
In any case another thing you need to be aware of to avoid is:
Bringing down your highlights too low. Bringing down your highlights too low will start to give them a grey look or muddy look. Whites are honestly a tricky thing when shooting digital. You don’t want to make them too bright and lose the detail, and at the same time you also don’t want to make them too dark that they begin to look grey and not white. Here is a visual example to help you really see:

You can see in comparing the images above, it starts to become very grey and muddy looking when you bring the highlights down too low. In our middle image, the whites are white while still retaining detail. The left is far too blown out and the right is looking grey. And it’s important to note, the only thing I changed on the far right image was that I brought the highlight slider way down.
the best hack for nailing whites
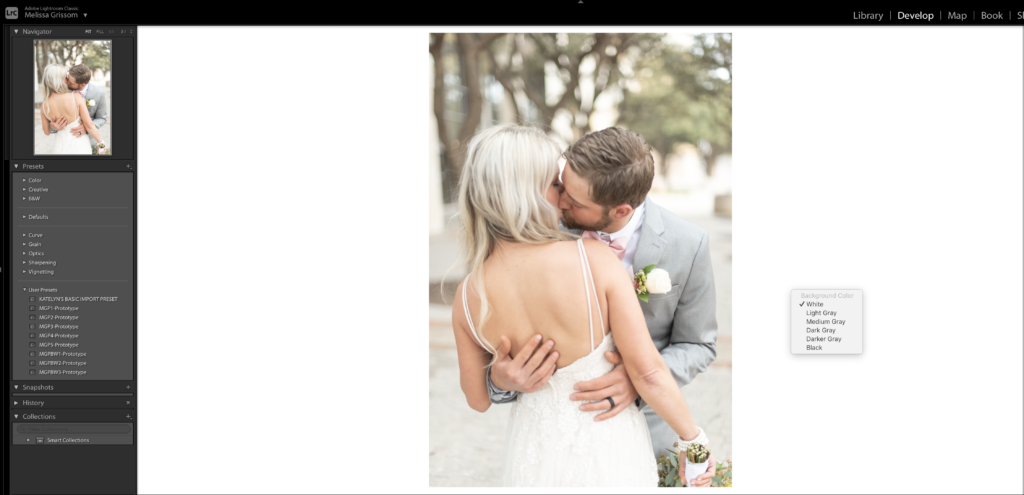
OK, now for the hack! When it comes to trying to be dead on with your whites it is so super helpful to make the background of your editing space in Lightroom white. Genius right? All you have to do is command+click on the default grey area surrounding your photo and select white, ta da! Super helpful.
Now let’s move on to an additional way to help you nail how to edit light and airy.
an awesome one click tip
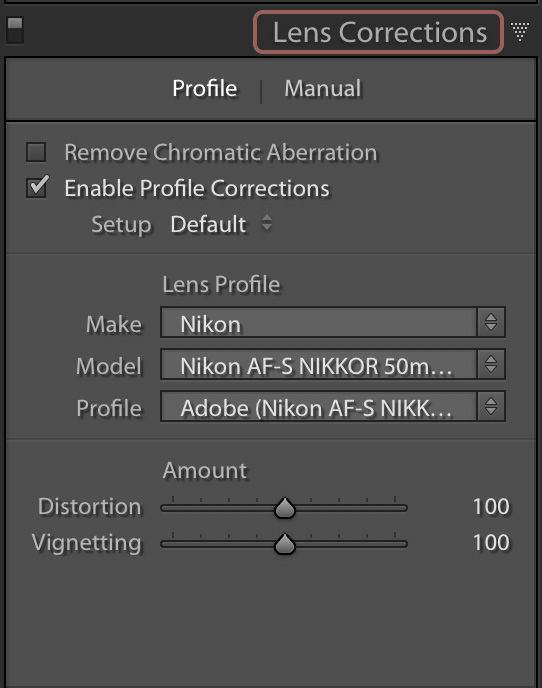
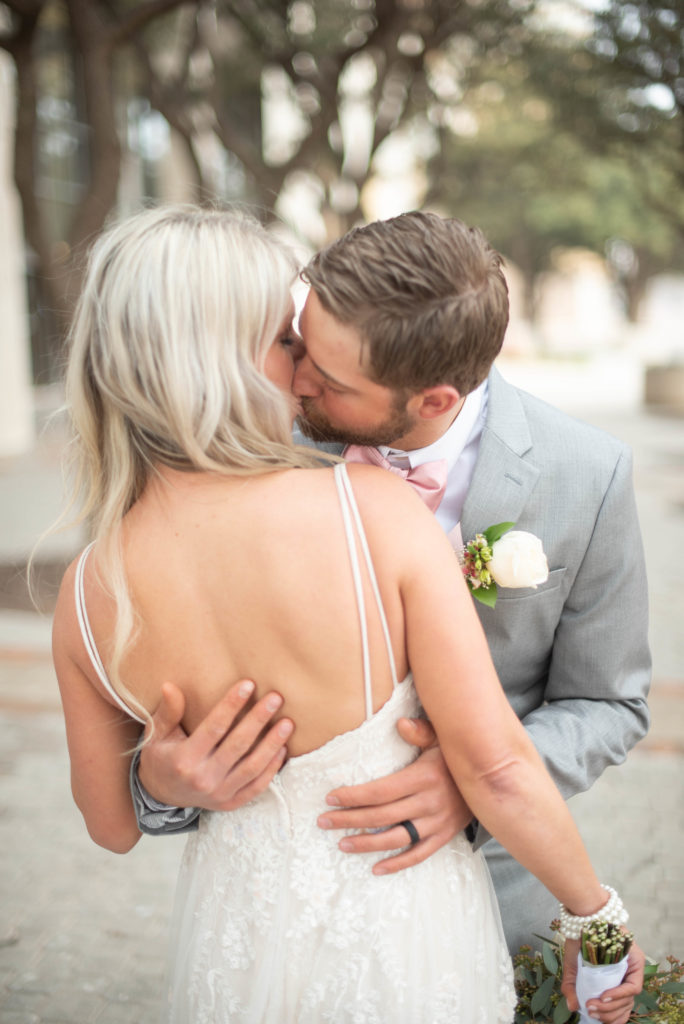
This is such a stinking amazing little trick for light and airy editing! Literally you guys, it’s one click and it’s pretty magical. Find your lens correction tab in the develop module in Lightroom. Check “Enable Profile Corrections”. Voila! Essentially what it does is remove the vignetting (or darkening around the edges) caused by the lens and brightens all the edges around the image. Gosh does it create some magic, just look at what this single adjustment does to the entire image. Best. Hack. Ever.
Presets for light and airy editing
Let’s just talk about presets for a second! May be you’ve heard of them, if not, what is a preset? Essentially it’s a pre-made one click saved collection of adjustments to achieve a desired look. I use presets for every single one of my weddings and sessions. Why? Because it is incredibly helpful not just in saving time, but also in helping to achieve my look consistently. In my last post, I spoke about the importance of brides/clients needing to trust that your work will be consistent to what you’ve shown in the past and being able to “picture” themselves in your images. This is part of how you gain their trust. And trust is a huge part in gaining a bride as your bride.
Not only do my presets adjust for the light & airy, softer style, but I have meticulously created an entire set for both color and black and white that adjust the coloring in images to achieve my signature look. I absolutely adore the look of film and they are very much replicated after that aesthetic. Because let’s face it: I’m obsessed with film! And the best news is I’ll actually be making available my personal preset collection for everyone else to purchase! As of September 1, 2020! *insert party emoji here* There are a total of 8 presets, five color and three black and white. I am so so excited to help you to be able to achieve the perfect light and airy look! Sign up below to be the first to know when they’re available for purchase and access to any discounts 😉
just keep swimming
I never realized how much I use Disney references in life until I started blogging haha! If you get the heading title reference to this section you are my people! My point to this is… y’all just keep doing. I know sometimes you can look at others’ work and feel so inspired, yet slightly or even madly frustrated that you aren’t there yet. I’m here to remind you, you will be. You’ll be everywhere you want and are exactly where you need to be. Just believe in yourself to keep doing the dang thing. Practice your craft, and give yourself permission to not be perfect, because none of us are. You are imperfectly you and that is not only what makes you and your work special, but beautiful!
And there you have it friends, the basics on how to edit light & airy. Truly hope it helps you along the beautiful journey you are on.
xo

You May also like:
How to attract your ideal client
How to plan a styled shoot
Leave a Reply
My promise to you
Every love story deserves to be told in an authentic, real way. When you look back at your wedding photos, I want you to remember every detail and feeling.
My artistry is created by you, and your deep connection to each other and your loved ones. From prep and planning, day of hyping, and getting artwork into your hands, you deserve to be cared for during this incredible time of your life.


[…] How to Edit Light & AiryHow to attract your ideal client […]
Where can I find your light and airy presets?