

Uplevel Your Images in Post Processing


When I think back to the beginning stages of my business, it is almost embarrassing to admit, I had ZERO clue about the post processing… well, process. Do I give all the photos? Edit them drastically? Use the software that the camera came with? What software/s do I use? This series will be all about how to uplevel your images in post processing. From software, to finding a style, to shooting for your style, to basic edits, more advanced edits, to using presets and batch editing. With me?! If ya are, in the words of Scuttle, let’s get cracking…and yes I just made a Disney reference.
OK, let’s start with software. When it comes to software you have to have something for culling your images and something for the actual editing. Streamlining your cull to edit process is super important for time efficiency. The smoother your process is, the faster you’ll be able to get your editing done.
FOR CULLING
1) Your first option is Adobe Bridge. In my opinion it takes the longest. I used it for years and if I could go back in time and tell myself what to do, this would definitely not be my recommendation.
2)Adobe Lightroom. If you’re newer to this game this is most definitely where I would start. They have a simple rating process and it’s much faster than Bridge, and the software you’re culling in is where you will be editing.
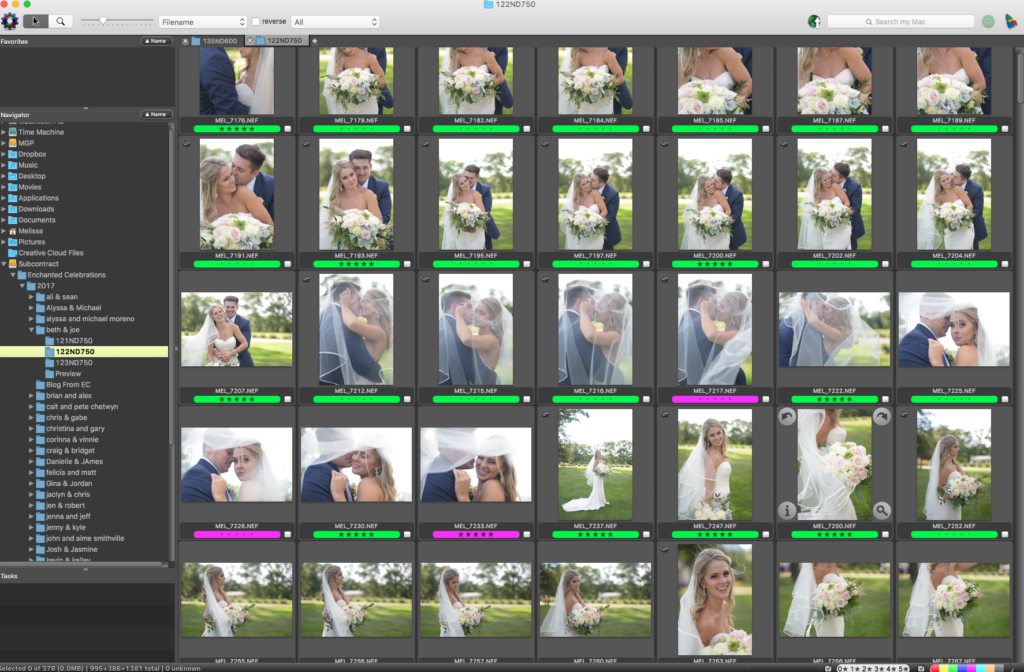
3)Photo Mechanic. Ok. So if you’re going to be a little bit of a fancy pants- this is the culling software I would suggest. It’s also the software I would suggest for all wedding photographers. This, though, does comes with a hefty initial investment. Whereas the Lightroom/photoshop/bridge suite, you can get for merely $10/month, photo mechanic will cost you about $150 up front. However, it was worth every single penny. It has literally cut my editing time down by half. HOLLLLAAAA! You can set the ratings to align with Lightroom so that when you import, your ratings are carried over. You can get a free 30 day trial, but fair warning, you will cry when it ends.
FOR EDITING
1) Adobe Camera Raw (ACR) to Photoshop. Adobe Camera Raw is the window that will pop up that is integrated between Bridge And Photoshop. So when you pull RAW files from Bridge into Photoshop, ACR pops up. While this is definitely the slower of the two options, it will get the job done for you.
Pros: You can create presets for Adobe Camera Raw (more on that later), which will help speed up your process. You can automatically apply your preset/s to all images in Bridge. You can sync your adjusted settings across a set of images.
Cons: It just runs slower. The culling process is slower, the loading process is slower. It would not be my pick for a wedding photographer. If it’s portraits sessions, and you don’t mind a bit of slowness in your life, knock yourself out.
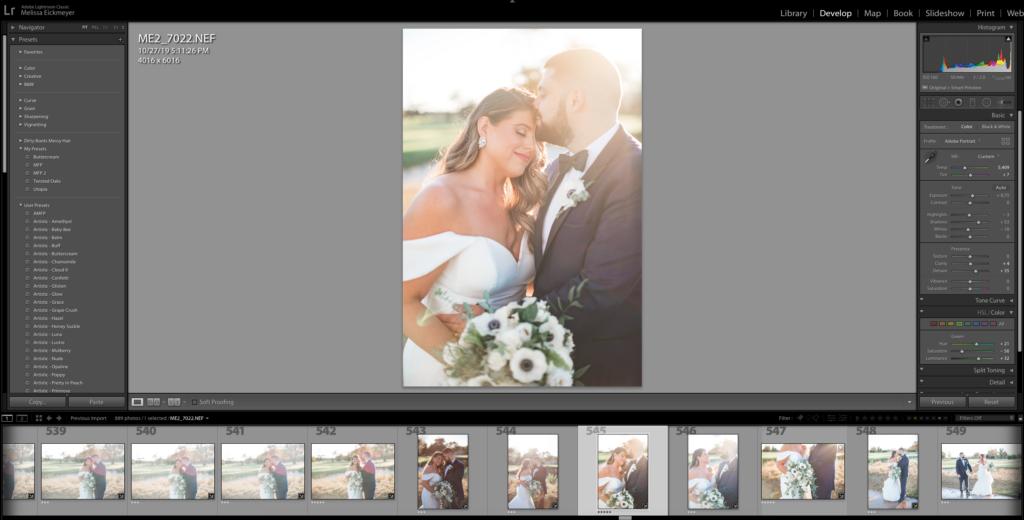
2) Lightroom. This would be my recommendation. To me, it’s the simplest/quickest option. This software by the way, was made with photographers in mind.
Pros: Simpler learning curve for most. You’re working in just one software, one window. You can easily load presets, work with something called ‘smart previews’ which loads the images quicker, apply your favorite preset upon import, sync any adjusted settings… pretty much everything you’d wanna do, you can do in here.
Cons: I honestly can’t think of any! Coming from a Photoshop background, Lightroom to me was a learning curve. But most find this much easier to learn, and it really is nothing too crazy to pick up. That’s all for now! Next, in our uplevel your images in post processing, we’ll chat about the culling process. You can read all about that, part 2 in this series, here.
You may like
Grow your business during Covid 19.
Leave a Reply
My promise to you
Every love story deserves to be told in an authentic, real way. When you look back at your wedding photos, I want you to remember every detail and feeling.
My artistry is created by you, and your deep connection to each other and your loved ones. From prep and planning, day of hyping, and getting artwork into your hands, you deserve to be cared for during this incredible time of your life.


[…] Ok first thing! This is actually part of a series of blog posts about elevating your images in post processing. So if you’re just joining us, you should definitely check out the links I listed below. (Particularly shooting for your style. If you already know you want light and airy starting with concepts in camera is crucial!)Shoot for your styleFinding your styleCullingWhat Editing Software should I Use? […]