
Up Level Your Images Part 2


Ok, so last post in this series, we chatted about what software to use! Now, let’s move on to: Up Level Your Images Part 2!
Wrapping up your session or wedding, you take 100’s or 1000’s of photos. Do you give all these images to your client? No! For one, going through a zillion images can be overhwelming for anyone. You need to consider this part of your job and a service you are providing to your client. Secondly, would you rather give 150 images with lots of ‘ehh’ mixed in, or 40 AMAZING images that your clients will absolutely love? Which do you think will have a stronger impact? Lastly, what you show and deliver will really help define your style as a photographer. Hence, this is why we cull! Meaning, you need to go through every single shot you’ve taken and rate your images for which will make it to the ‘next round’. This shouldn’t be an agonizing process. So let me explain my simple process and some rules to help make this easy peasy!
THREE SIMPLE RULES TO CULLING
1) The number one thing you need to do while culling, is to go with your gut instinct. Ultimately, your final choices will be what is contributing to defining your ‘style’, and that is something you just feel. No need to spend 5 minutes staring at each picture, when it pops up, do you immediately like it or feel ehhh?
2) Make sure you consider the musts- is everyone looking good? MOST importantly, is the mom or bride looking good? Yes the groom matters, kids matter, but the number one person I can guarantee you are trying to make happy in this photo is the female. We are SUPER hard on ourselves and if we aren’t happy with how we look we won’t be so happy with the photos. Also check- No blinks? No talking? OK then girlfriend, proceed.
3) Chances are you are going to have a bunch of shots that are super similar. Ya know, like almost stinking identical, but a hair of a difference that no one but yo’self will really notice. Please do your best to not overwhelm your client by giving them too many of the ‘same’ shots. Again, it’s better to give a smaller amount of UH-MAZING shots, then give a ton of ‘good’ with the exceptional mixed in.
ON YOUR WAY TO UP LEVEL YOUR IMAGES
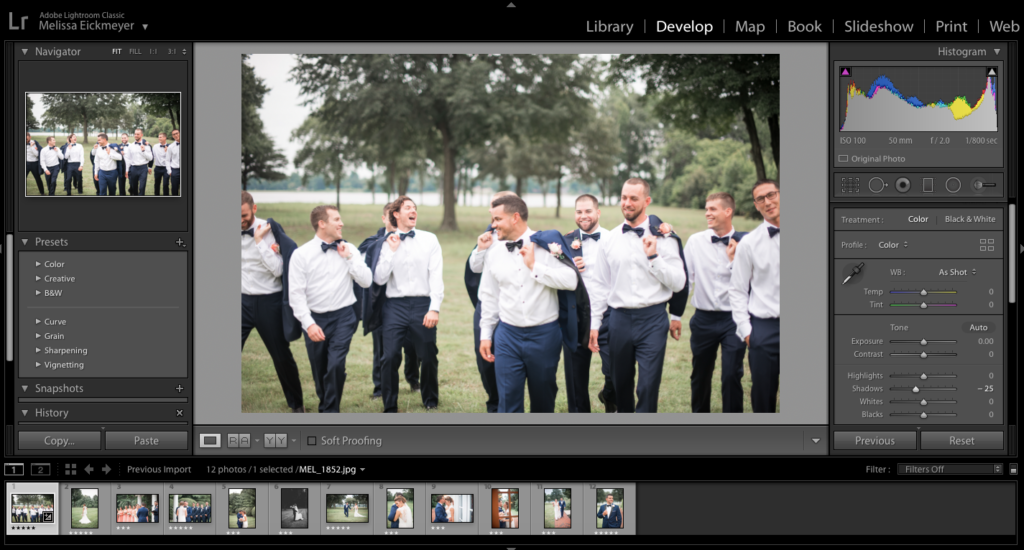
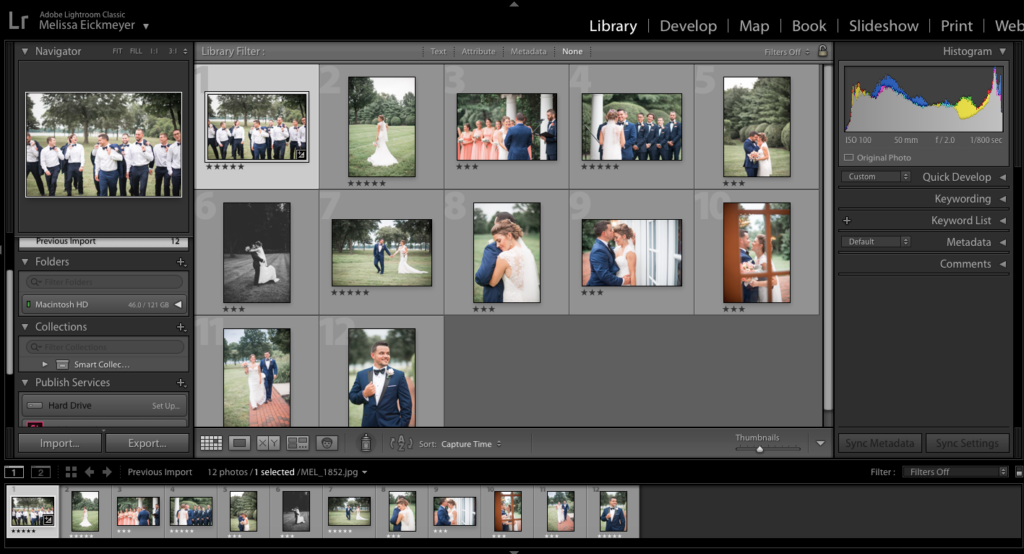
To wrap this post up, let’s just address how to cull in the software! If you are using Lightroom, the number one on your keyboard will give a one star rating, two=two stars, and so forth. If you are using PhotoMechanic, you can set the software settings for the ratings to work the same as they do in Lightroom, one through five. This way when you drag the images into Lightroom from PhotoMechanic, the ratings transfer over. (Click here for a simple tutorial on how to do this in PhotoMechanic). And if you are using Adobe Bridge, it essentially works the same, except you have to hold down the command key while hitting numbers one through five.
I also want to recommend, instead of going through your images and taking out the ones you don’t want to keep, I always suggest rating for the images you do want to keep. To rate my images, I use the number three for every image I like. If I love it, I rate it five stars. I will typically go through my number three ratings a second time and do the process again, but this time re-rating my favorite number threes with a number four. This helps eliminate any ‘duplicates’ or anything I consider subpar quality. The number four images are the ones I use for their final gallery. And while number fives are obviously included, they are the ones I will use for client previews.
And there ya have it guys! Super simple! I hope you are enjoyed this info on how to up level your images part 2! Next week before we dive into the actual editing process, I want to chat about finding and developing your personal editing style. Read part three here!
YOU MAY ALSO LIKE:
How to Grow Your Business During Covid
How to Attract Your Ideal Client
What’s in my Camera Bag
How to Plan A Styled Shoot
My Equipment:
Nikon D750
Nikon D600
Nikon 50 1.4
Nikon 35 1.8
Nikon 85 1.8
Sigma 135 1.8
Leave a Reply
My promise to you
Every love story deserves to be told in an authentic, real way. When you look back at your wedding photos, I want you to remember every detail and feeling.
My artistry is created by you, and your deep connection to each other and your loved ones. From prep and planning, day of hyping, and getting artwork into your hands, you deserve to be cared for during this incredible time of your life.


Be the first to comment